I'm a big fan of Ulysses for writing. Using the simple Markdown syntax, it is easy to concentrate on writing content without any unnecessary distractions. Because of that, I also wanted to write my bachelor's thesis in Markdown with Ulysses.
Did I build this workflow to procrastinate from actually writing my thesis? Maybe 😅
But in the end, I found it to be a smooth experience that helped me finish the thesis more quickly.
However, there are some features that Markdown does not provide out of the box, which are necessary for writing a thesis. Namely, generating tables of content, reference management and citations, cross-references, and equations. So, I looked for ways to fill in those gaps.
This article requires a basic understanding of using the command line and is mainly focused on macOS users. For installing required software, Homebrew is recommended
Project Structure and Version Management with Git
As a developer, I'm used to using Git in my projects, committing changes, and being able to see a log of everything I did. As I wanted to open-source my thesis anyway, I decided to use Git with GitHub for it as well.
My project structure is fairly simple. All content and content-related files are
located in a src folder. This is what it looks like in my project folder:
.
├── output
└── src
    ├── bibliography
    ├── content.textbundle
    └── template
If you want to explore the project structure, visit my thesis repository.
Ulysses to Markdown
Ulysses uses a syntax that extends Markdown's usual spec. They call it "Markdown XL". To process your text, you need to get it out of Ulysses. You could just add an external folder to Ulysses and work with that, but that disables a lot of features, like easily inserting images, iCloud sync, the ability to split your content into multiple sections, etc., that make Ulysses great.
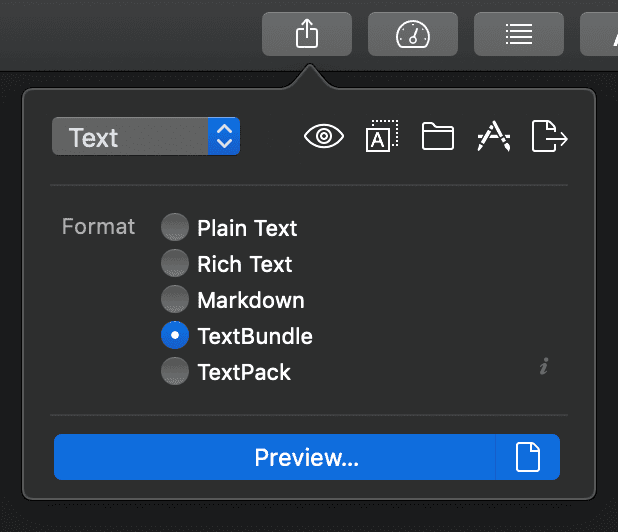
An easy workaround is exporting your content as a TextBundle. A TextBundle is essentially a folder that contains your content as a Markdown file and all assets like images that your text contains. I exported my thesis into the Git repository every time I finished a section.
Reference Management with Zotero
A good thesis needs good sources and managing them all by hand is tedious and error-prone. This is where Zotero comes in. Zotero is a free and open reference management software that supports a variety of export formats. Using its Chrome extension, it's easy to add new sources.
To make Zotero compatible with our workflow, you need to install the Better BibTeX extension. This extension enables Zotero to automatically create and update a bibliography file that we can later integrate into the other tools.
To create the bibliography file, click Export, select Better BibLaTeX and check
Keep updated. You can now save this file in your project folder next to your
exported TextBundle.
Zotero to Ulysses
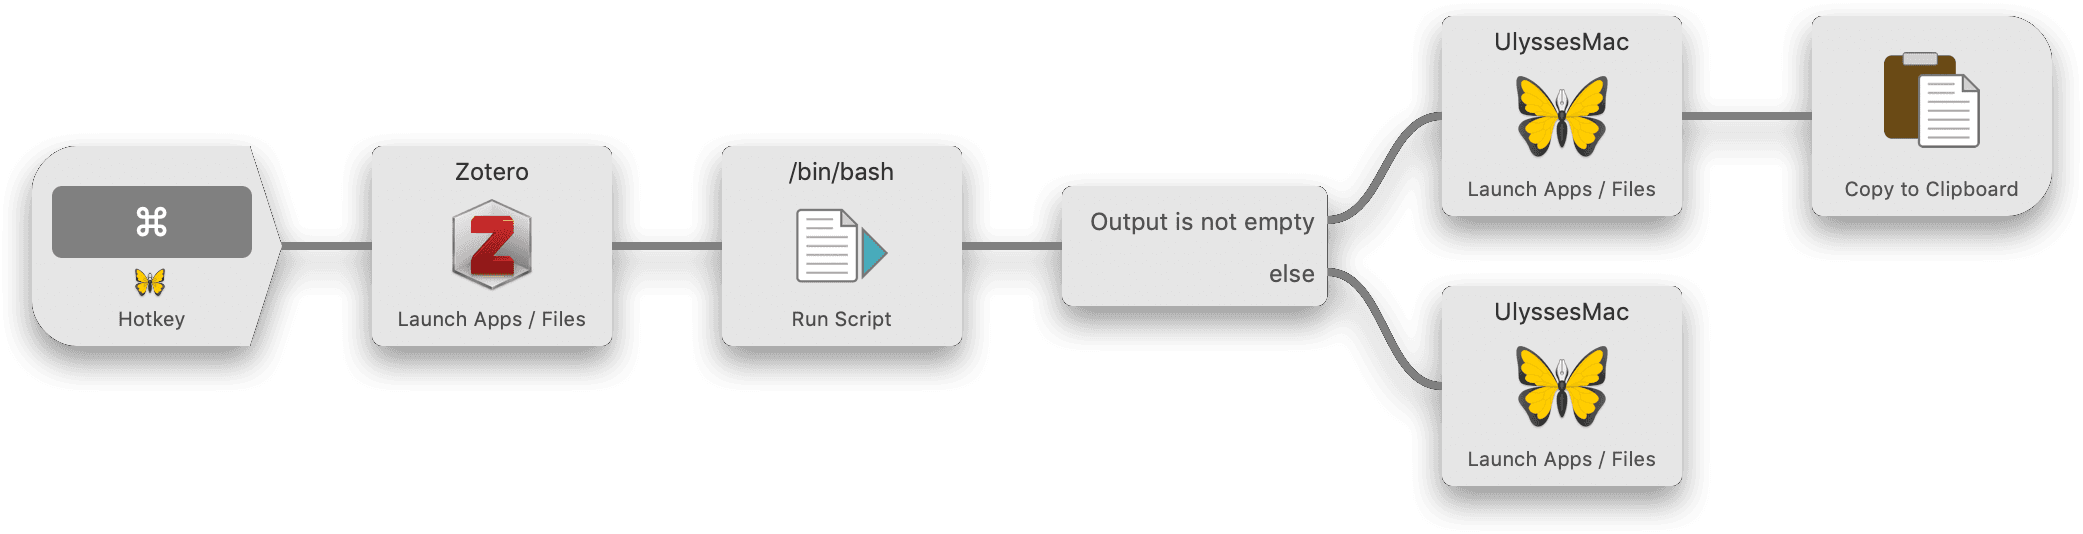
To make it easier to insert references from Zotero into Ulysses, I created an
Alfred workflow that provides a simple shortcut to do that. In Ulysses, just
press ⌘ + ^ and Zotero will show you a search window where you can search for the
reference you want to insert. When you've got your references, press enter and Zotero
will insert the reference into your document.
You can download this workflow here. Of course, you can change the shortcut or the way it behaves in Alfred.
Inserted references look like [@knapp2019], where knapp2019 is the reference key
from Zotero. If you want to provide a page, you can just add it to the reference:
[@knapp2019, pp. 20-24] . This is Pandoc syntax, but more on that in the next
chapter.
Typesetting with Pandoc and LaTeX
Pandoc is a useful utility for converting different markup formats between each other. In our case, we need to convert Markdown to LaTeX. In addition to converting markup formats, Pandoc supports processing citations and cross-references using plugins.
If you just want to compile your document to a PDF with a template, you can skip to the next section.
You can install Pandoc and required extensions using Homebrew:
$ brew install pandoc pandoc-citeproc pandoc-crossrefTo convert your text to LaTeX, use the following command inside the TextBundle:
$ pandoc --filter pandoc-crossref --filter pandoc-citeproc \
  -M cref=true --top-level-division=chapter -s \
  --bibliography ../bibliography/bibliography.bib --biblatex \
  -o text.tex text.md
This will generate a standalone (-s) TeX file containing the converted text and all
packages that are required to compile it. To work with LaTeX files, you need the
MacTeX package. To install it do that, run:
$ brew cask install mactexThis will install all required packages that you need to work with LaTeX. Please note that this package is quite huge at about 4 GB.
To compile the generated LaTeX file to a PDF, run the following command:
$ latexmk -pdf -f text.texThis will take a few seconds depending on the size of your document and create a PDF
called text.pdf. The created PDF already contains a generated bibliography and
looks nice. However, you might want to customize it so it fits your or your
university's style.
Templating in LaTeX
Creating a template in LaTeX is easy and chances are that there's already a good template for your university or other styles that you can use.
In my case, I used a template by Manfred Enning for the style of my university, FH Aachen.
Create a new index.tex file in the template directory and insert the template
here. There are only three important things you need to make sure.
First, the template must include the text.tex file generated by Pandoc. To include
it, insert the following line where the content should be placed:
\input{../content.textbundle/text.tex}Second, LaTeX needs to know where referenced images are stored. For that, insert the following line before the beginning of the document:
\graphicspath{{../content.textbundle/}{.}}Third, if you use references, you need to tell LaTeX to import them and where to place them. To do that, add the following lines to the start of your template:
\usepackage[style=authoryear-comp,backend=biber]{biblatex}
\addbibresource{../bibliography/bibliography.bib}
Then, add the following line where you want to insert the bibliography:
\printbibliographyIf you want to add a table of contents, a list of tables, or a list of figures, you can add these lines:
\tableofcontents
\listoffigures
\listoftables
For an example of what this template file could look like, take a look at my template on GitHub.
Now, to compile your document to a PDF using the template, you need to compile your
Markdown file to LaTeX again, but this time without the standalone (-s) flag. If
you've skipped the typesetting step, you can now skip to the next section. Otherwise,
run this command:
$ pandoc --filter pandoc-crossref --filter pandoc-citeproc \
  -M cref=true --top-level-division=chapter \
  --bibliography ../bibliography/bibliography.bib --biblatex \
  -o text.tex text.md
Then, switch to the template directory and run the following command:
$ latexmk -pdf -f index.texThis will create an index.pdf file containing your styled document.
Streamlining the Workflow with Docker
The last steps all seem like a lot of work that you don't necessarily want to do every time you want to compile your document to PDF. To make it all easier, I've created a Docker image that does all the work for you.
If you don't already use Docker, you can install it by running:
$ brew cask install dockerTo compile your document using Docker, just run:
$ docker run --rm -i --user="$(id -u):$(id -g)" --net=none \
  -v "$PWD":/github/workspace "leolabs/pandoc-latex"
This image will then convert your Markdown to LaTeX, make sure all images are in a
supported format, compile everything to a PDF, copy it to the output directory and
clean up any files that have been created during the compilation – LaTeX creates a
lot of files.
Automating the Build Process with GitHub Actions
If you want to automatically let GitHub build the PDF on every release you create, add this file to your repository. Now, every time you create a release on GitHub, your document will automatically be compiled to a PDF and the result will be attached to the release like this.
This process takes a few minutes but since it runs automatically in the background, it doesn't really matter.
Tips for Using LaTeX Syntax in Markdown XL
Using Pandoc with the plugins described above allows you to use special syntax for specific LaTeX commands.
Named References
Named references can be added to figures, tables, equations, and sections. For
figures, place {#fig:referenceName} directly after an image in Ulysses (no
whitespace allowed). You can now reference the figure with @fig:referenceName.
The concept works the same for the other categories. Named sections, for example, work like this:
# Section Title {#sec:referenceName}You can now reference that section using @sec:referenceName.
Equations
Writing equations in Markdown XL is as easy as creating a new Raw Source Block
(~~...~~) and adding a math block with the equation inside of it. For example:
~~$$1 + \frac{24 * 2 + 5 * 3}{6 * 4} = 3,625$$~~ {#eq:referenceName}Labelled Tables
To create a table with a label, you can place the label below the table after a colon like this:
| Type     | Count |  ø Time | Median Time | ø Commits |
| -------- | ----: | ------: | ----------: | --------: |
| Atom     |     9 | 1:30:23 |     0:48:00 |      13,2 |
| Molecule |    10 | 1:20:12 |     1:12:45 |       8,9 |
| Layout   |     5 | 1:21:48 |     0:57:00 |       3,0 |
| Template |     5 | 2:30:30 |     2:27:00 |       4,0 |

: Average Times for Components {#tbl:referenceName}
Wrapping Up
The presented workflow might look a bit complicated, but it works well once it's all set up. I didn't need to worry about layout issues or how my text would be formatted later and could just write in my favorite editor, an environment that I'm already used to.
Since the content is written in Markdown, it can easily be published to other mediums, like blogs, ebooks, and more. This makes it super flexible.